


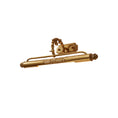


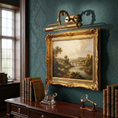
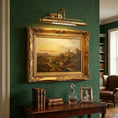

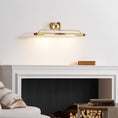
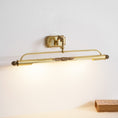


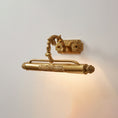
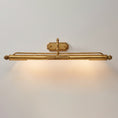
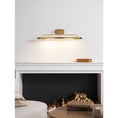
Antique Brass · Picture Frame · Gallery Wall Lamp
A slim antique brass frame that holds your chosen photo, print, or artwork — and lights it. The integrated lamp washes the piece in a warm, gallery-style glow, making any image feel curated. Swap the artwork as often as you like; the frame stays, the display changes.
In stock now, with limited quantities available. All orders ship within 48 hours and arrive in a week or less.
Skip the long wait of international transit and upgrade your home today. Whether you prefer a sleek modern finish or a classic aesthetic, these fixtures dispatch directly from our domestic facility to your doorstep.
See It In Action
Product overview
Length — Choose at Checkout
Three lengths share the same 15.5 cm height and 15.5 cm wall projection — pick the length that best suits your artwork and wall space.
Small
L 45 cm
L 17.7″
H 15.5 cm · Depth 15.5 cm
Medium
L 58 cm
L 22.8″
H 15.5 cm · Depth 15.5 cm
Large
L 76 cm
L 29.9″
H 15.5 cm · Depth 15.5 cm
Materials & Craft
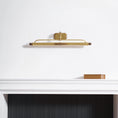
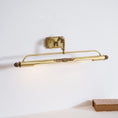
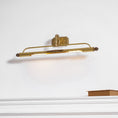
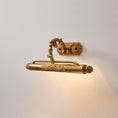
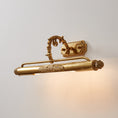
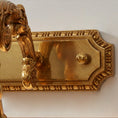
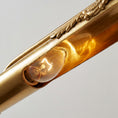
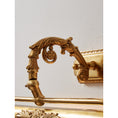
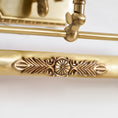
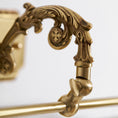
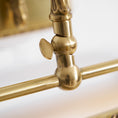
Antique Brass
Solid brass body with a warm hand-finished antique patina.
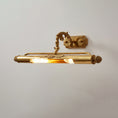
Picture Frame
Holds a photo, print, or artwork — swap pieces to refresh your space.
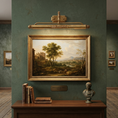
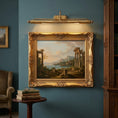
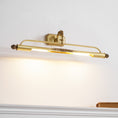
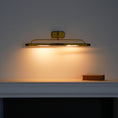
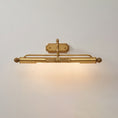
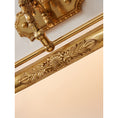
Gallery Glow
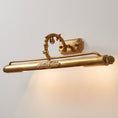
Directional integrated light washes the artwork — quietly curated illumination.
Product Notes
| Fixture dimensions | Small: L 45 × H 15.5 cm / L 17.7″ × H 6.1″ Medium: L 58 × H 15.5 cm / L 22.8″ × H 6.1″ Large: L 76 × H 15.5 cm / L 29.9″ × H 6.1″ |
| Wall projection | 15.5 cm / 6.1″ — consistent across all sizes |
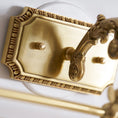
| Junction box size | L 16 × H 7 cm / L 6.3″ × H 2.8″ |
| Body material | Solid brass |
| Finish | Antique brass |
| Socket type | E12 or E14 candelabra |
| Bulb included | No — sold separately |
| Mount type | Wall-mounted · Hardwired · Horizontal orientation |
| SKU | RDW-212218 |
Before You Install
The Pania mounts to a recessed wall junction box sized L 16 × H 7 cm / L 6.3″ × H 2.8″. This is slightly larger than a standard single-gang wall box.
If your existing wall box is a different size, your electrician can install a junction box adapter or a fresh recessed box before mounting. Please confirm this with your installer before ordering.
Installation
- Hardwired wall installation — a licensed electrician is recommended.
- Requires a recessed junction box sized L 16 × H 7 cm / L 6.3″ × H 2.8″. All mounting hardware is included.
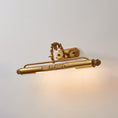
- Designed for horizontal wall mounting — the frame is oriented landscape, with the integrated light running along the top edge.
- Artwork is inserted from the back via a removable backing panel — full detail in the installation guide.
- Suitable for indoor dry and damp locations. Not rated for wet/shower zones or exterior use.
FAQ
How do I insert or change the picture? +
The frame has a removable backing panel that allows you to slide artwork in and out from the back. The process is the same whether you're hanging the fixture for the first time or swapping prints later. The installation guide covers the exact steps.
What artwork size fits each length? +
The interior frame opening is slightly smaller than the external length. As a rough guide, your artwork should be approximately 3–5 cm shorter than the external length and around 10 cm tall. For precise sizing, refer to the spec sheet before ordering, or cut your print to fit.
What if my wall junction box is a different size? +
The Pania requires a recessed junction box of L 16 × H 7 cm / L 6.3″ × H 2.8″. If your existing box is smaller or a different shape, your electrician can install a larger recessed box or a junction-box adapter. Please confirm this step with your installer before ordering.
Which bulbs do you recommend? +
E12 or E14 candelabra-base LED bulbs in warm white (2700K), 3–4W each (≈40W incandescent equivalent). Longer sizes use more bulbs — the exact bulb count per variant is listed in the spec sheet.
Is this fixture dimmable? +
The fixture itself is compatible with dimming. Pair dimmable E12/E14 LED bulbs with a TRIAC-compatible dimmer switch (e.g. Lutron, Leviton Decora). Standard non-dimmable bulbs will run at full brightness only.
How do I care for the antique brass finish? +
Dust with a soft dry cloth. For fingerprints, a slightly damp microfiber cloth followed by thorough drying is fine. Avoid abrasive cleaners, harsh chemicals, and brass polishes — the antique patina is intentional, and polishing will remove it.
Downloads

- Unique shape design
- Made responsibly
- High quality material
- Tested for durability
CARE
CARE
- Dust with a soft, dry cloth.
- To protect finish, we do not recommend the use of household cleaners or abrasives.
- Do not exceed specified wattage.
SHIPPING & RETURN POLICY
SHIPPING & RETURN POLICY
Enjoy free shipping on all products. With Front Door Delivery, your item ships from our Distribution Center via UPS within 2–3 business days and arrives at your home in 4–6 weeks. Eligible items may be returned within 30 days of receipt. Made-to-order items are not eligible for return.
10%
OFF
Use this code at checkout to enjoy a 10% discount on your entire purchase.


Fast Shipping
4-6 weeks for delivery

North American Certification
North American Certification Overview

Safety Payment
Secure payment with Multiple Credit Cards.


Measuring for Pendant Lighting
When installing pendants and chandeliers, it’s important to consider how you want your fixtures to hang in relation to the other furnishings in your space. Read on for our recommendations on how to hang the perfect light.
Kitchen
Aim for 30–36″ from the bottom of your fixture’s shade to the top of your island or countertop. Space multiple pendants 26–30″ apart. For a sense of proportion and balance, allow 12″ from the outermost fixture to the edge of your counter.
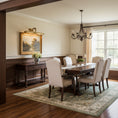
Dining Room
For optimal lighting and visibility, the bottom of your pendant should sit 30″ from the surface of your dining table. To scale your fixture, take the length and width of the room in feet, then convert that to inches. For a 10′ by 14′ room, the chandelier should be about 24″ wide.
Bedroom
If you’re hanging a pendant above a nightstand, allow for at least 30″ between the bottom of the shade and your nightstand’s surface. To keep the look balanced, center your pendant over your nightstand.

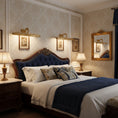
One fixture. Every room. Infinite arrangements.
Mount it horizontally above a mirror, vertically in a corridor, or flanking a headboard — the linear sconce reshapes the spatial grammar of any wall it inhabits.
Lineam Lucis — A line of light on every wall.

What Makes a Sconce Linear?
Stripped to its essence: a long, slender bar of light, mounted flush to the wall.
Unlike a conventional sconce with a shade or arm, the linear wall lamp presents its light source as a horizontal or vertical stroke — an architectural element as much as a lighting fixture. The profile is minimal, the shadow it casts intentional. It draws the eye along the wall rather than up or across the room, creating a sense of calm, ordered space.
Three Ways to Mount
The same fixture reads entirely differently depending on axis and placement. Here are the three arrangements our designers recommend — each suited to a different room and purpose.
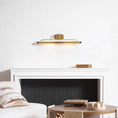
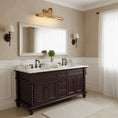
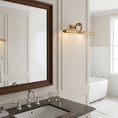
The classic application. Mounted horizontally above a bathroom vanity, bedroom headboard, or over a console table, the horizontal sconce creates a strong, grounding line that widens the perceived space. Ideal for spans of 18–48 inches; pair two symmetrically for a balanced composition.
Rotated 90 degrees, the same fixture becomes a hall sconce that draws the eye upward and lends height to a corridor or stairwell landing. Mounted at eye level in pairs flanking a doorway, it creates a ceremonial, gallery-like threshold. The vertical mount is particularly striking in minimal interiors with high ceilings.
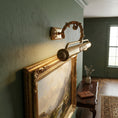
Select models feature a pivoting arm that rotates the light bar toward a specific surface — typically artwork or a bookshelf. This is the preferred setup for gallery picture lighting, where precise beam direction matters more than ambient spread. Check individual product listings to confirm pivot availability before purchasing.
Seven Sconces, One Discipline
Each model interprets the linear form through a different finish and function — from the gallery-ready picture light to the understated vanity bar.


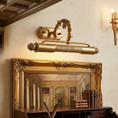
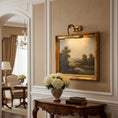
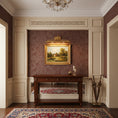
Your Art Deserves Its Own Light
The picture light is among the oldest uses of the linear sconce — and the most demanding.
Illuminating artwork requires control: the beam must be warm enough not to bleach colour, narrow enough not to flood adjacent walls, and angled so it falls evenly across the canvas from top to bottom. Our pivoting picture lights are engineered for this task — a low-profile backplate that mounts flush to the wall, a slim bar that extends forward at the right depth, and LED lamps pre-tuned to 2700K warmth that enhances oil paint and photography alike.
Five Rooms, One Fixture
The linear sconce's versatility is its greatest virtue — below, the five spaces where our customers find it indispensable.
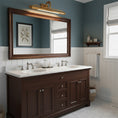
Bathroom Vanity
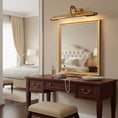
Mounted horizontally above or on both sides of a mirror, the linear sconce provides shadow-free task lighting for grooming — the professional lighting designer's preferred alternative to overhead downlights.
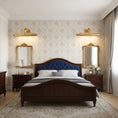
Bedroom Headboard
A horizontal bar centred above the headboard replaces two bedside lamps, freeing the nightstands and creating a cleaner architectural line. Ideal for platform beds and built-in millwork headboards.
Hallway & Corridor
Vertical pairs flanking a doorway or spaced along a long corridor create a sense of arrival and procession — a lighting technique borrowed directly from museum gallery design.
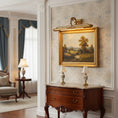
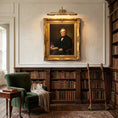
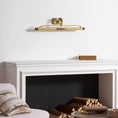
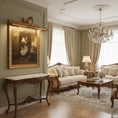
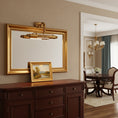
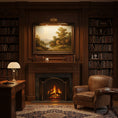
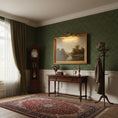
Living Room Gallery Wall
Above a console, sofa, or fireplace mantel — the linear picture light throws warm, focused illumination onto your curated art collection, turning the everyday into exhibition.
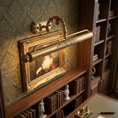
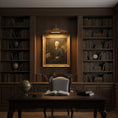
Home Library
A slimline sconce between bookshelves illuminates spines and reading corners without the visual weight of a pendant or floor lamp — keeping the space intimate and the books the focus.
Four Steps to Perfect Light
All mounting hardware and a step-by-step guide are included in every box. A licensed electrician is recommended for the wiring step.
Use the included template to mark the wall-box position. Confirm the centre height — typically 65–72 inches from the floor for a vanity, or 6–8 inches above the artwork for a picture light. Cut or locate the existing wall box.
Connect the ground, neutral, and live wires to the junction box. For dimmable operation, ensure the circuit is wired through a TRIAC-compatible dimmer (Lutron Skylark or equivalent). Electrician's work — do not skip.
Feed the wires through the backplate opening and fasten the mounting bracket to the wall box using the included screws. Press the backplate flush and secure with the decorative bolts. Check level with a spirit level before fully tightening.
Clip or screw the light bar onto the backplate. For pivoting models, rotate the arm to your desired angle — typically 30–45° down for picture lighting, or parallel to the wall for ambient/vanity. Insert your preferred E26 LED bulb and restore power.